How to Install DK Coil & Ignition Relocation Kit on Sportster without Tank Lift

Harley Davidson Sportster: How to Install DK Coil & Ignition Relocation Kit
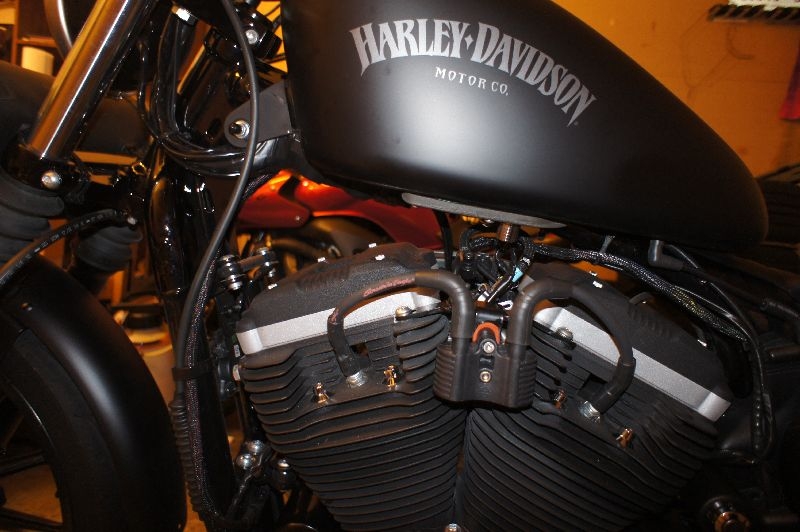
Harley Davidson mounts the ignition coil and key switch along the frame rail beneath the gas tank, right at the front of the bike. Although functional, some owners prefer to open this area up by moving the coil between the cylinder heads.
This article applies to the Harley Davidson Sportster (2007-present).
With the added space gained by the relocation kit, you'll improve the looks of the bike and clean up the whole under-tank area. The extra space allows for a larger gas tank to be installed and increases cooling to the engine's cylinder heads. Because the kit moves the coil beside the engine instead of on top, less heat is transferred to coil, which increases the coil and spark plug wires' life.
Materials Needed
- Flashlight
- Scissors/diagonal cutters
- Flat blade and Phillips screwdrivers
- 3/8" and 1/4" ratchets
- SAE standard wrench set
- Electrical tape
- Allen wrench set
- Torx socket set
- 8" socket extension with wobble end
Here's some figures that illustrate some of the tools you'll need, and the parts.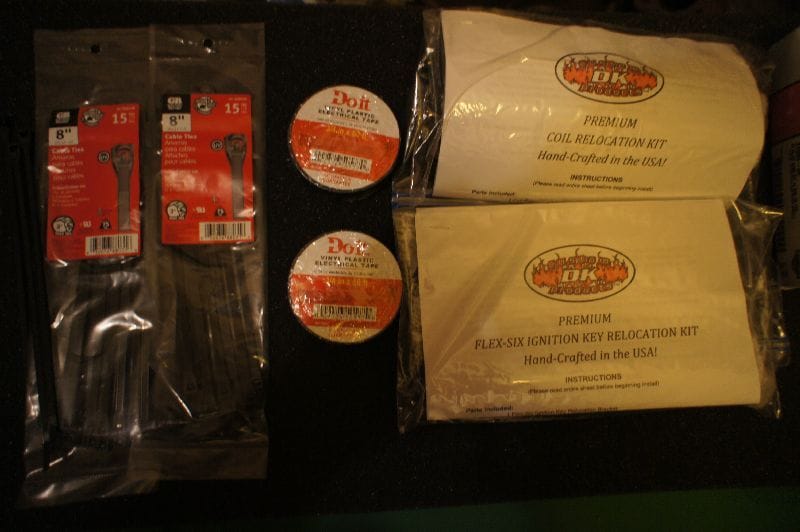
Figure 1. Zip ties, electrical tape, and the DK coil relocation kit/ignition key relocation kit.
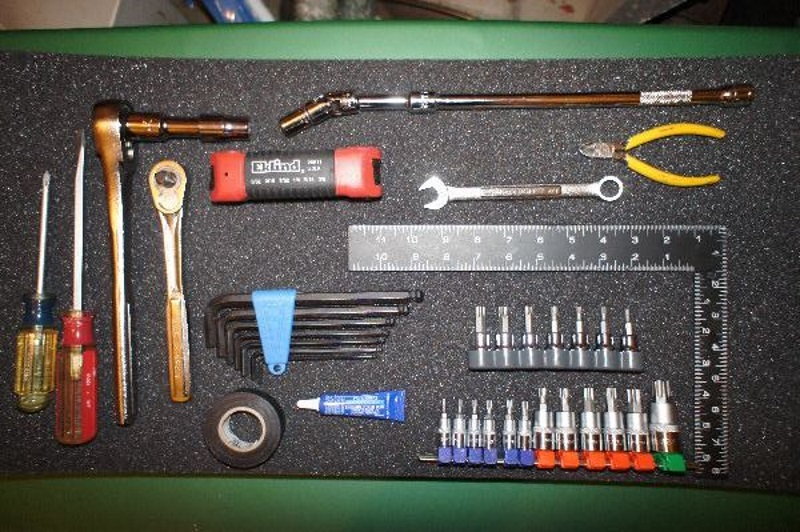
Figure 2. Most of the tools you'll need during the job.
Step 1 – Remove the main fuse
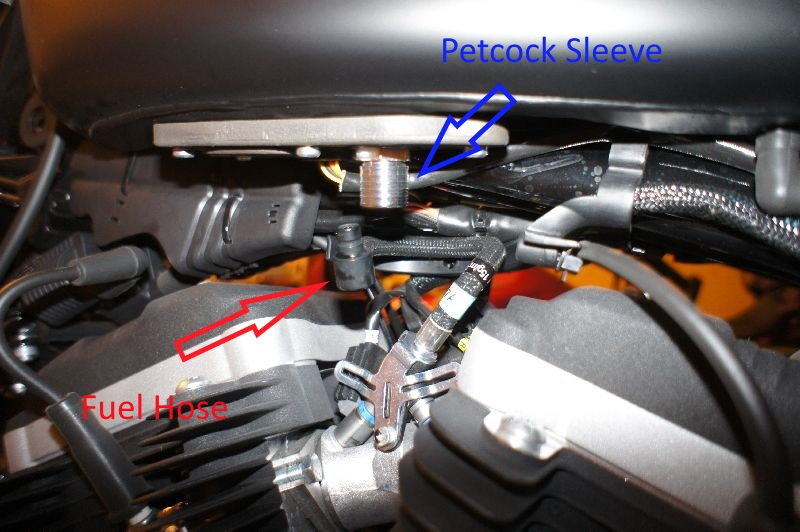
Step 2 – Disconnect the fuel petcock
Locate the fuel petcock at the bottom of the gas tank on the left side. This is going to be easier if the tank is nearly empty of fuel. Place a rag around the petcock to soak up any fuel that leaks, and push up on the metal sleeve while pulling the hose out of the petcock.
Step 3 – Remove the front tank mounting bolt
Remove the bolt by holding the nut on the opposite side of the tank mounting bracket with a wrench and loosening the bolt with a socket/ratchet. Once you slide the bolt out of the tank mounting bracket, place a small piece of wood or similar object below the tank to gain clearance in the area.
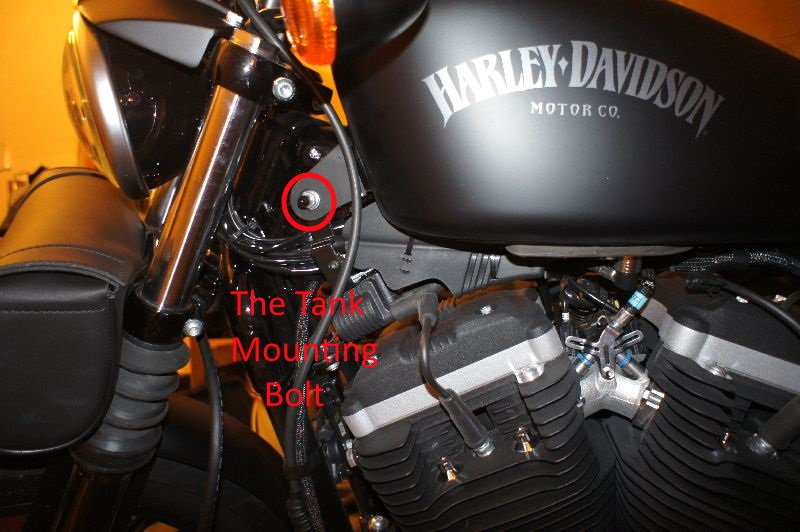
Figure 5. The mounting bolt nut is located on the opposite side of the frame.

Figure 6. Supporting the tank with a soft block of wood.
Step 4 – Remove the wire loom from the wiring
Behind the plastic covers located on the frame, under the tank, normally is the wiring you need access to. Remove the plastic covers by pulling them away from the frame at a 90 degree angle; they pop right off. Cut the zip ties and remove the wiring loom from the left and ride side wiring harness bundles. Locate the wiring the goes to the key switch, and the ignition coils.
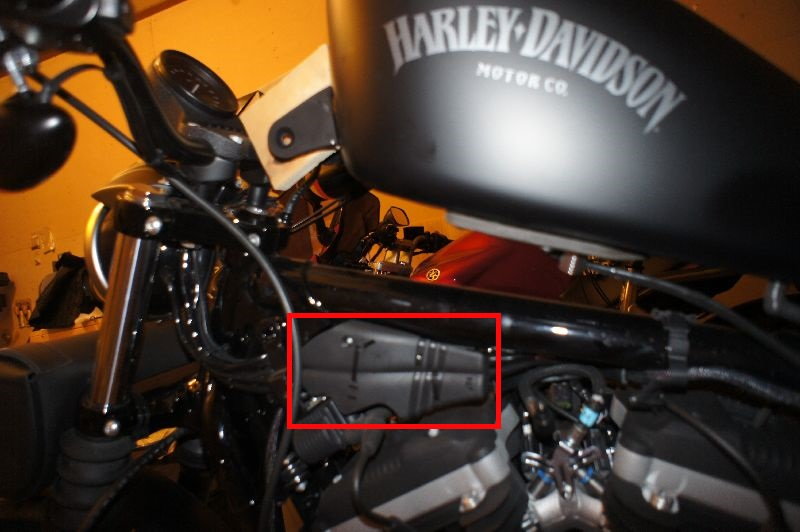
Figure 7. The wiring bundle cover.
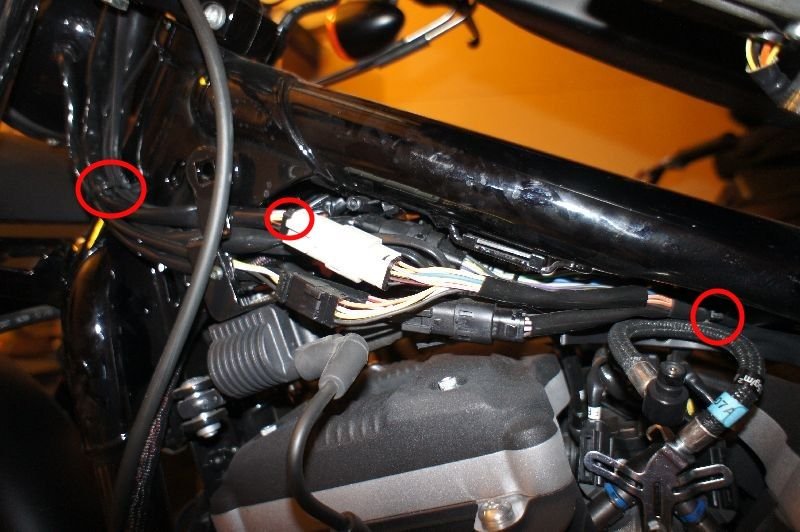
Figure 8. Remove the wiring loom and cut the zip ties from each wiring bundle.
Step 5 – Relocate the key switch
Unbolt the key switch from its mount and free the wires, so it will reach the left side of the engine. Wrap the red wires together with electrical tape in several places along the length of wire.
Step 6 – Install DK key switch mount and mount key switch in place
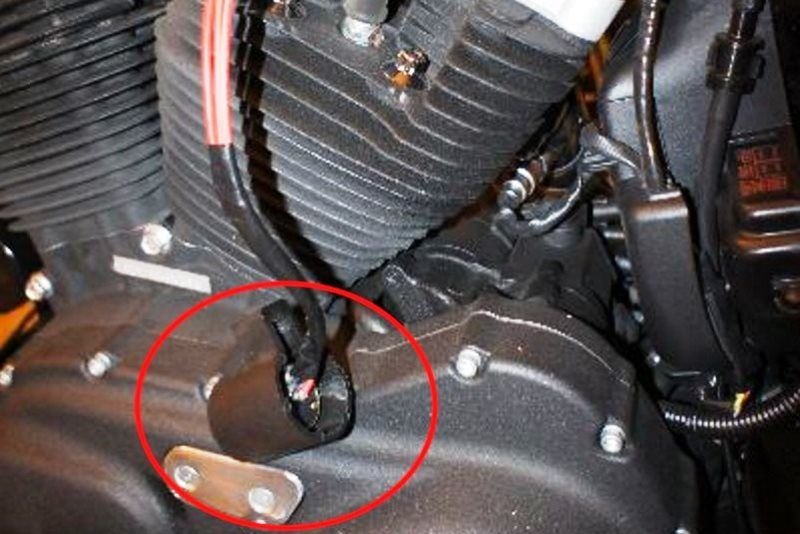
Use a long ratchet extension with a wobble to reach the primary case ground bolt nut. Remove the nut and mount the DK key switch relocation mount to bolt. Mount the key switch to the top of the relocation mount with the supplied hardware. Route the key switch wiring up along the frame, staying away from the engine, using zip ties to secure the wiring to the frame.
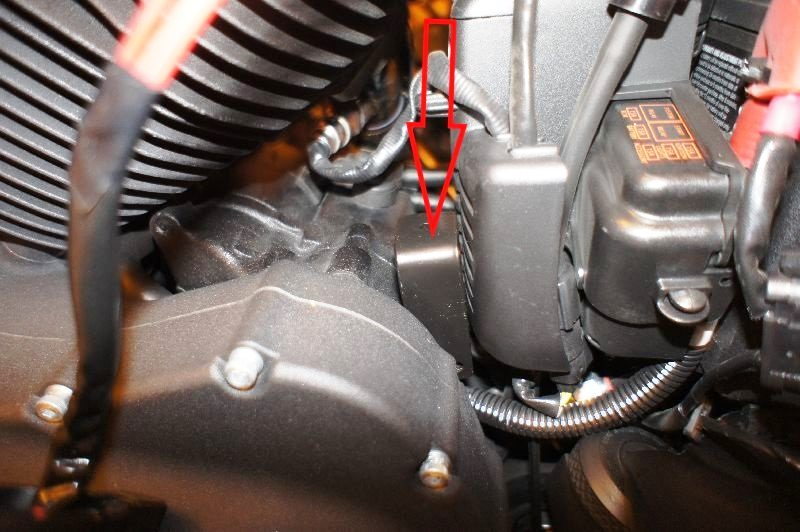
Figure 10. Mounting the DK relocation mount.
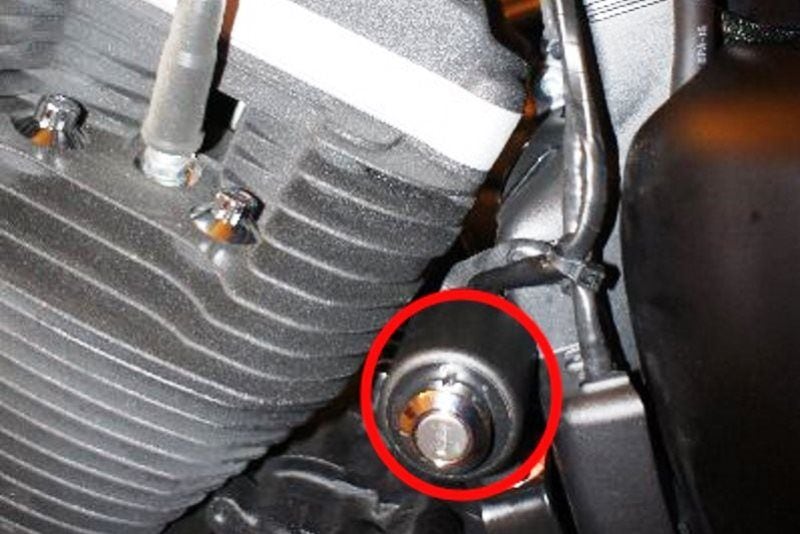
Figure 11. Mounting the key switch to the relocation mount.
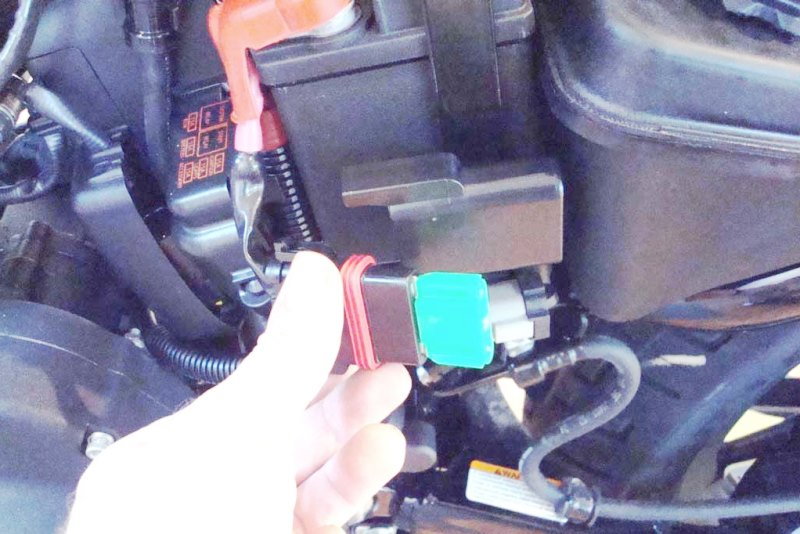
Step 7 – Mount ignition coils to DK bracket and install new spark plug wires
Label the ignition coil terminals as front/back or one/two to keep the ignition coils and cylinders paired. Remove the coil pack from the mounting bracket and unplug the wiring harness connector from the coils. Push the flap on the male end of the connectors to separate them. Wrap the wiring with some electrical tape and place the connector between the cylinder heads on the left side of the engine. Install the DK relocation bracket to the cylinder heads using the provided Torx bolts and install the ignition coil to the bracket. Re-connect the electrical connector to the coil and attach the new spark plug wires to the ignition coil and spark plugs.
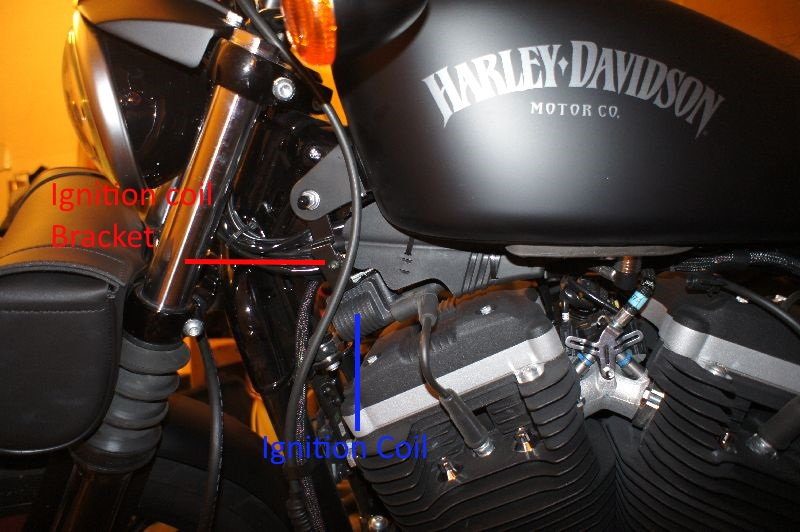
Figure 12. The ignition coil and ignition coil bracket.
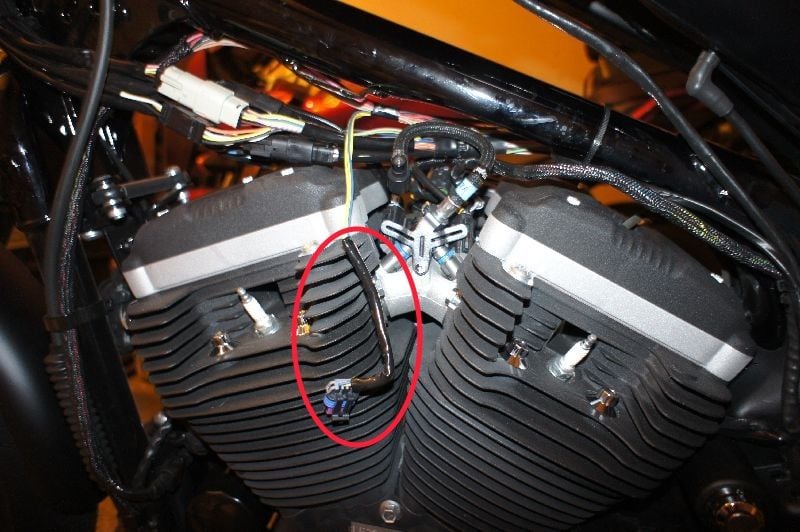
Figure 13. Relocating and wrapping the ignition coil wire.
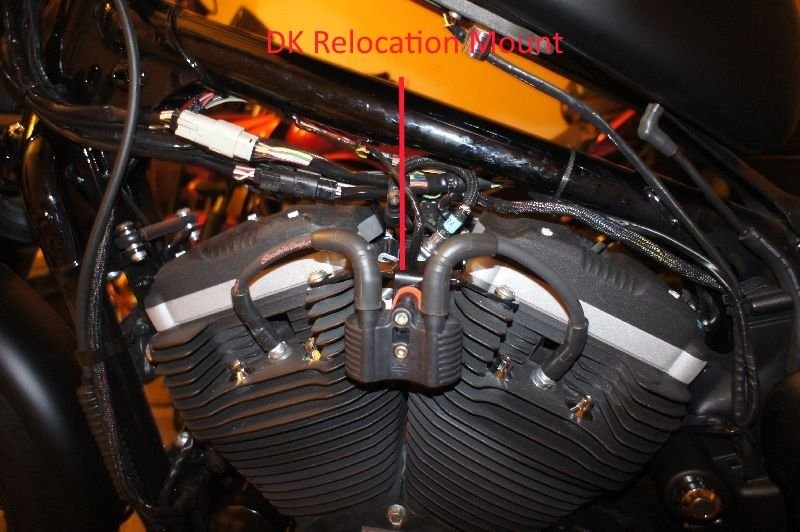
Figure 14. The DK relocation mount.
Step 8 – Tuck the wiring and re-assemble your Sportster
Route the new and existing wiring along the frame rail below the fuel tank OR above the frame if utilizing a Tank Lift. You'll want the wiring to sit low enough on the rail for the tank to fit. For a clean look, try to fit the wiring along the frame as close to the tank's installed position as possible. You'll need to bundle the wiring together with electrical tape tightly, test-fitting the clearance between the tank and wiring while doing so. Try to get it back to the neat routing it came with from the factory. This bike also had a 1.5" tank lift, which makes cleaning the wiring extra important. Once the fitment is correct, zip tie the wiring to the frame and re-install the gas tank. Re-connect the fuel petcock and main fuse. Start the engine and test your electrical accessories for proper operation. Pay attention to the bottom of the fuel fitting for leaks; you may need a new O-ring.